Inspections: your rooms, your checklist, a cleaner report
The checklist follows your property, room by room. Interim inspections ask for less, every report is reviewed before it is sent, and a sent report can be corrected.
The checklist follows your property. Each room you've set up on the property — every bedroom by its own name, the garage, the loft — is now its own section, with the items that belong to that kind of room. Property-wide items (entrance, consumer unit, heating, appliances, meters, safety devices) sit in their own group. An Edit rooms link takes you to the property's rooms and back; renaming a room keeps its photos. A Misc section takes photos and notes for anything that doesn't fit an item, and the electricity items now include an EV charger and solar panels or battery storage where present.
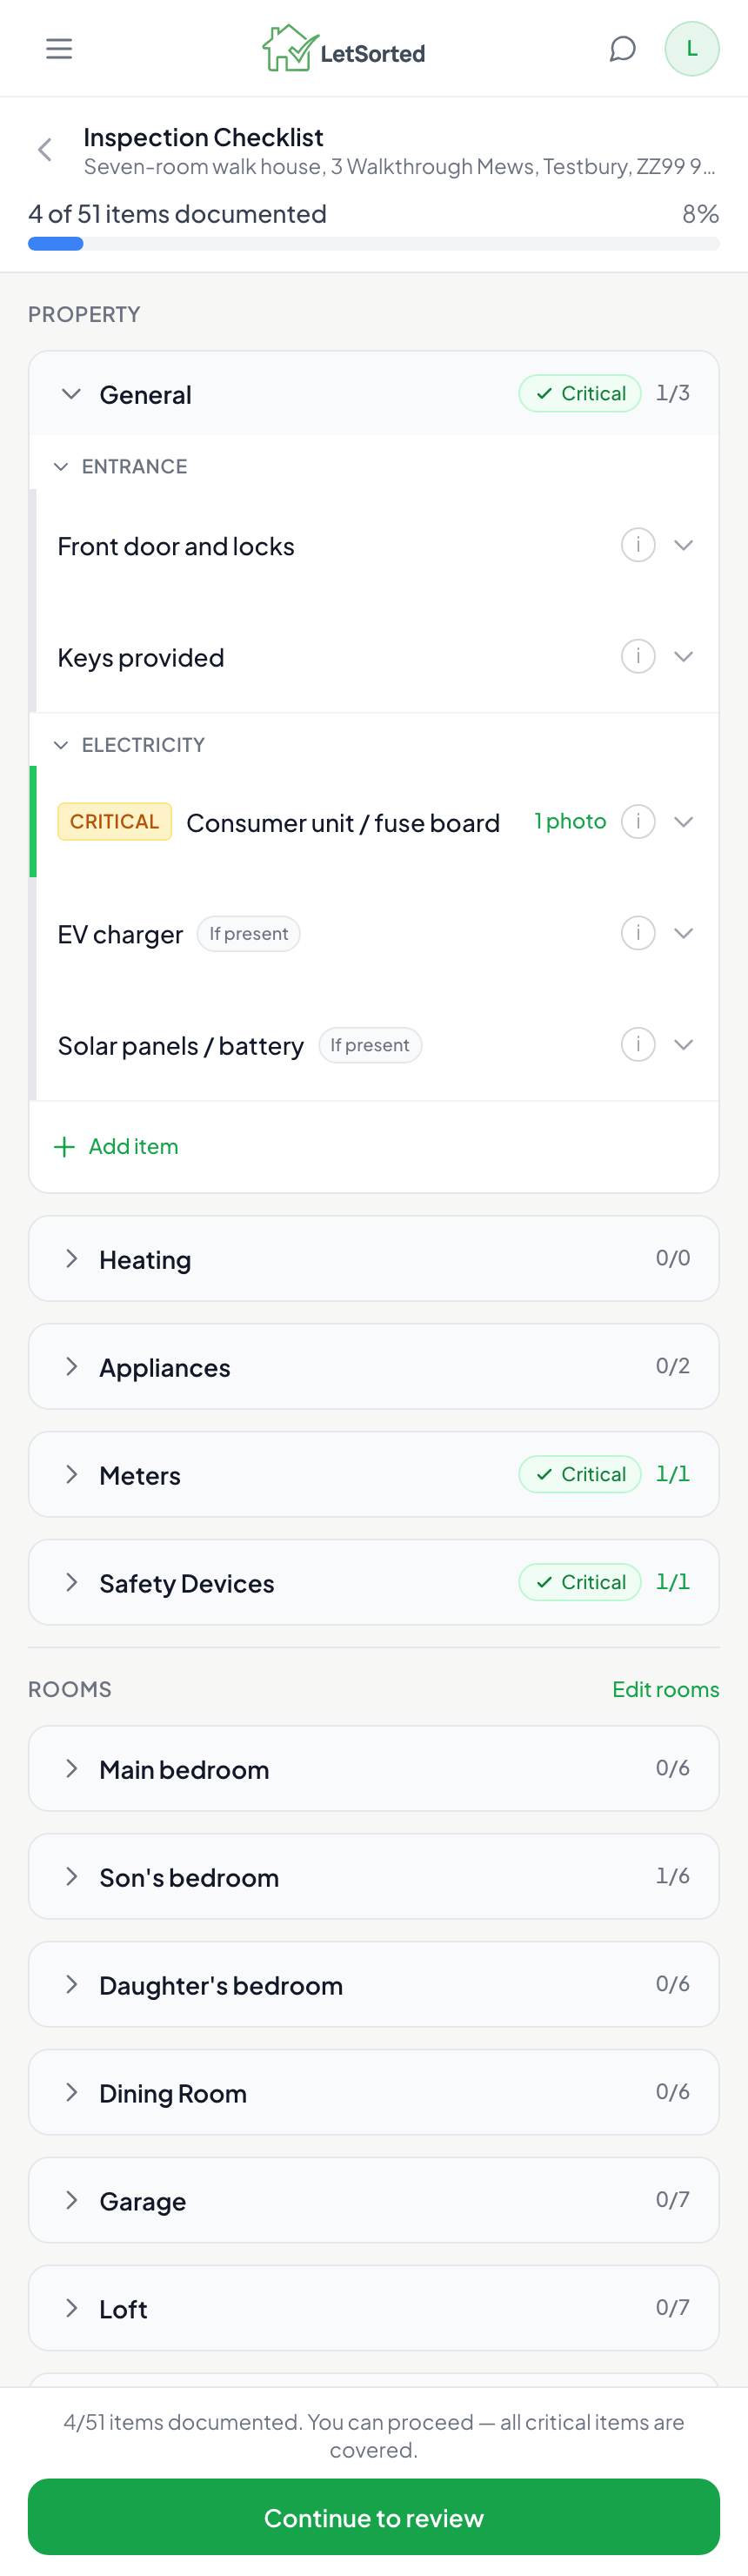
Interim inspections ask for less. From feedback: "keys provided" appears only on check-in and check-out, and meter readings are optional on an interim visit.
One flow, then review. After the checklist, you review what you've recorded — read-only, every section and photo — and then choose Send to tenant or Finish without sending. A report can't be finalised until its critical items are documented.
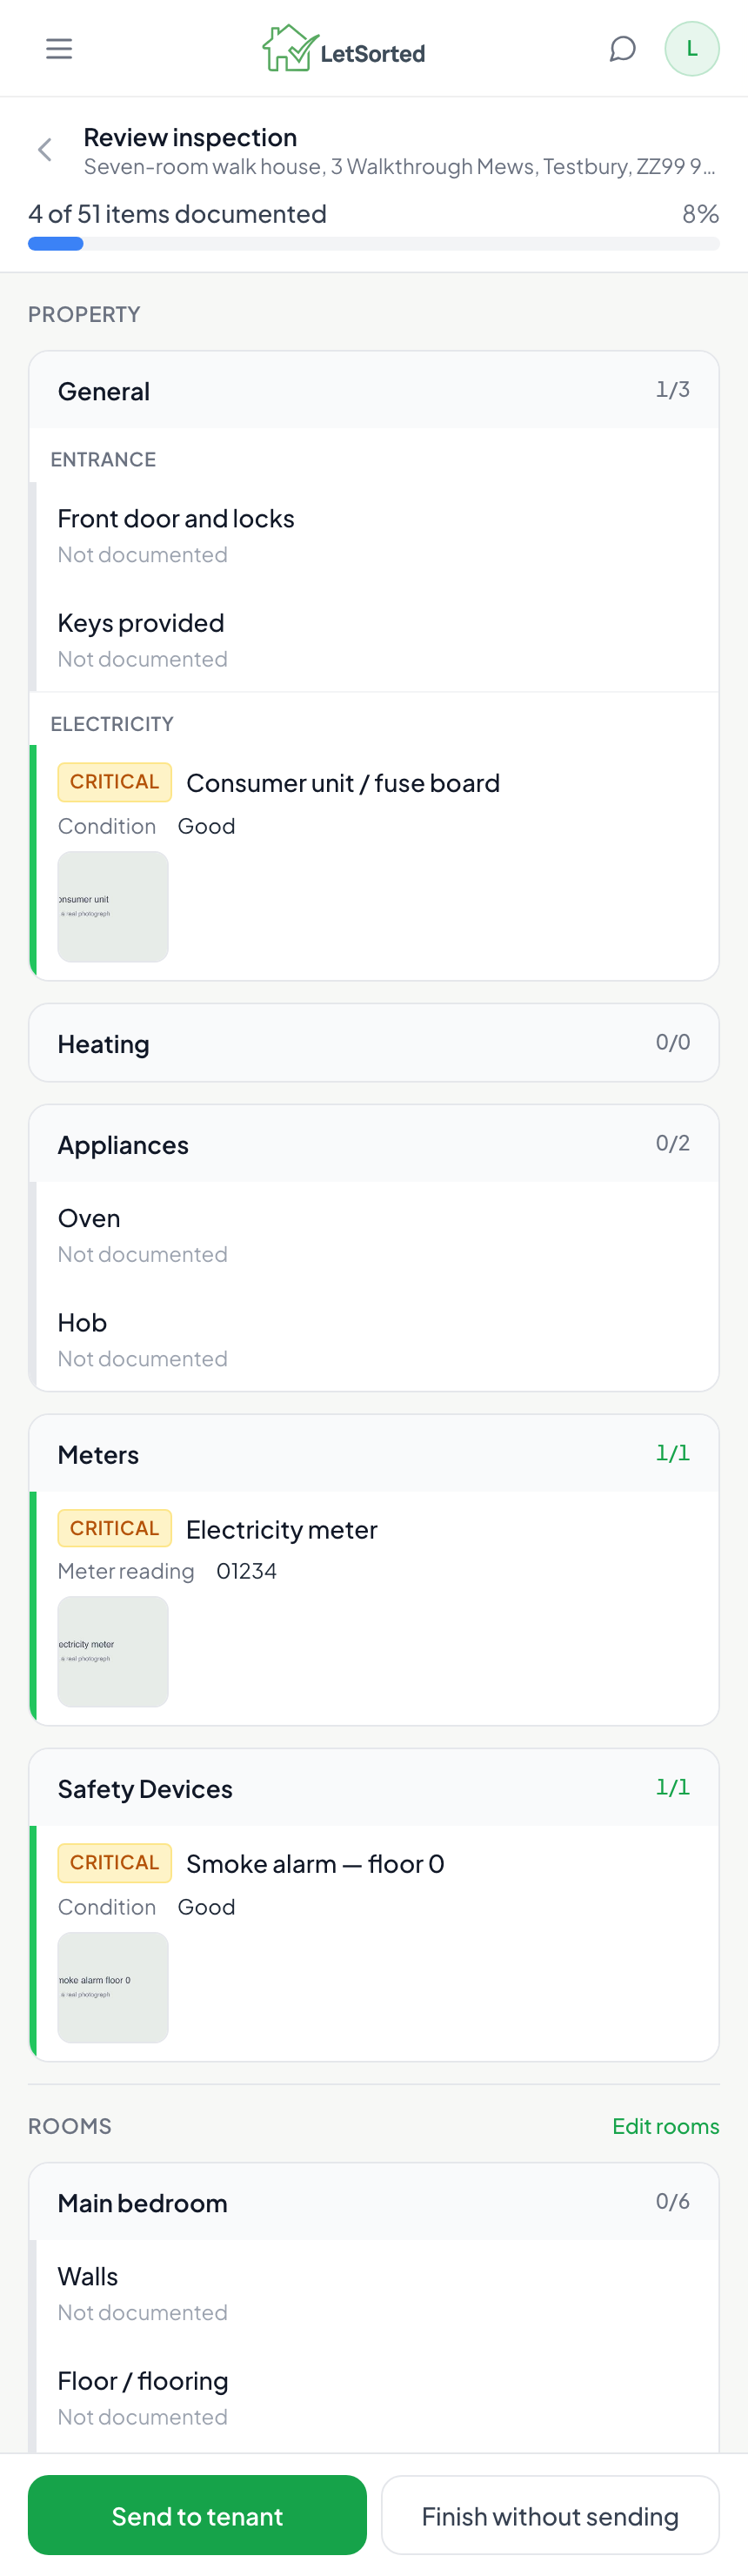
The report PDF. Every photo you took is in it. An item's heading and its photo stay together on the page, and photos sit two or three to a row. Names with accented or Polish letters print correctly.
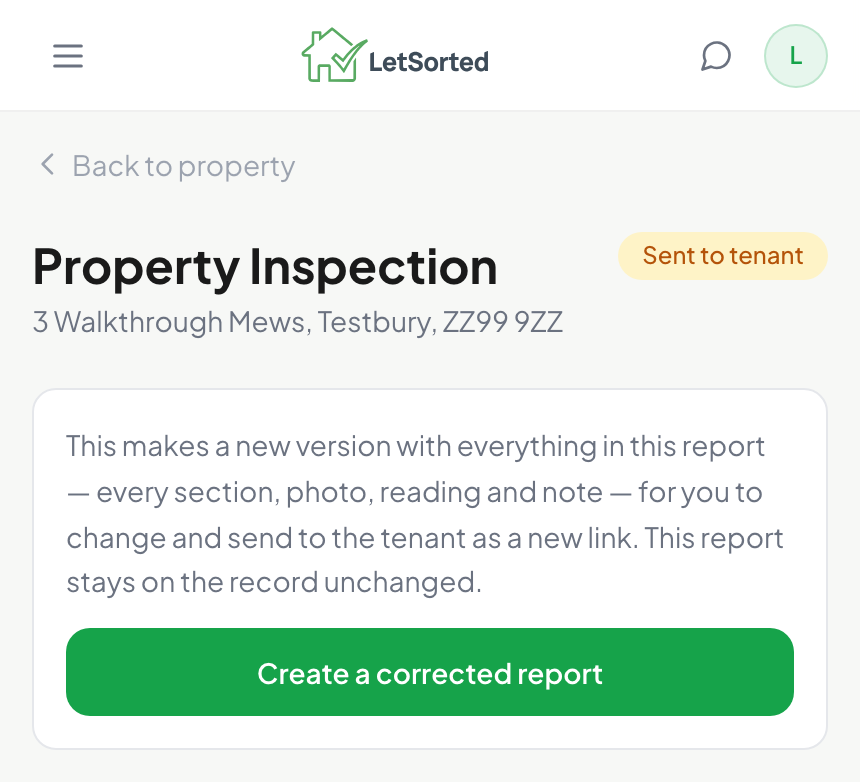
Correcting a sent report. If you sent a report with a wrong photo, create a corrected version: it starts as a full copy, you change what needs changing, and the tenant gets a new link with the list of changes. The original stays on the record unchanged.
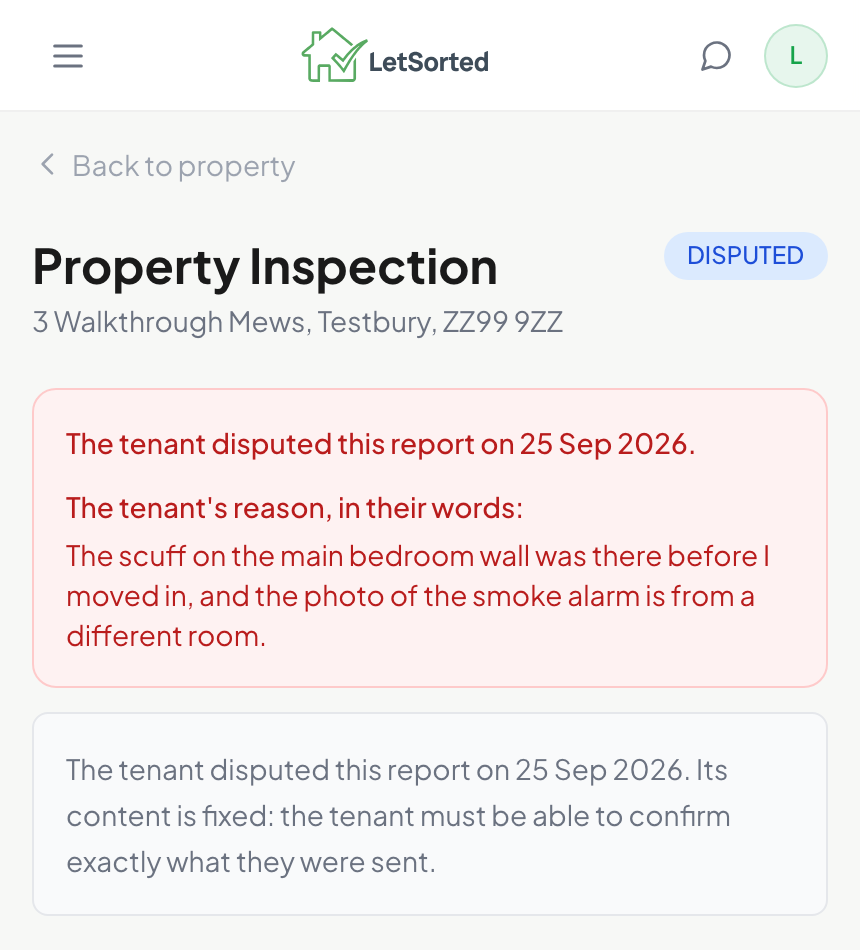
Disputes on the record. When a tenant disputes a report, their reason and its date are recorded and shown on the inspection, in the PDF and in the evidence pack.
Questions or feedback: reply to this email or write to [email protected].
Found this useful? Share with other landlords: